Anjan Dutta
Styling checkbox input using html and css
Styling checkbox input using html and css
Well, do I need to explain why we need to style our checkbox input? The default checkbox looks like it’s still in the ’90s. I mean, an HTML checkbox doesn’t support modern design.
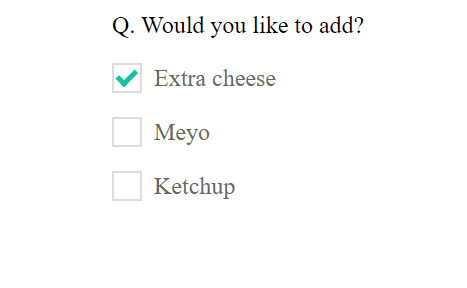
But, with a little bit of stylig, we can achieve the below like design.

Neither with the help of CSS nor with any other trick, the element is aesthetic resistant in itself.
Styling checkbox input
We can design it like anything we want. For the look and feel, you can use any CSS styling or image. For the demo purpose, I have kept it as simple as possible.
But that won’t restrict you from designing it to anything you want. I am going to discuss the base concept here, using that you can achieve all kind of designs for your checkbox using HTML and CSS. Simple!
Retaining the behaviour of a checkbox input
First thing first, we have to understand where we should use a checkbox. Well, we use it when there are more than one options to select.
So, keep that in mind and never design it like a radio button. You can if you want, but it is not worth the misrepresentation in UX.
Coming to the checkbox component, we will be using a checkbox in the background. We are going to hide the default element and replace it with an image or CSS, whichever is suitable in your case.
You may ask, how this new image or CSS component would respond to our click event? Good question.
I said we are going to hide the element, but what we will keep is the label of that element. Then, will use a “:before” or “:after” CSS pseudo property to append our custom design before or after the label itself.
The good thing about a label is that the click event to select or deselect a checkbox would work if we click on the label. Hence, clicking on the label will set the checked property of the native element to true or false.
Rest is the CSS property, where we will manipulate the checked property to show our desired image or CSS accordingly.
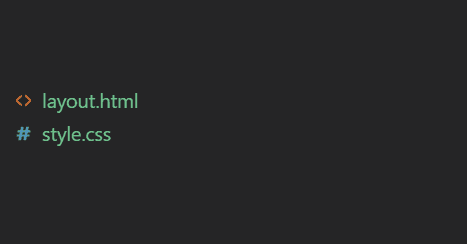
File Structure

The HTML
1<!DOCTYPE html>2<head>3<script src="custom-checkbox.js"></script>4<link rel="stylesheet" type="text/css" href="./style.css">5</head>6<body>7 <p>Q. Would you like to add?</p>8 <p>9 <input type="checkbox" id="em">10 <label for="em">Extra cheese</label>11 </p>12 <p>13 <input type="checkbox" id="md">14 <label for="md">Meyo</label>15 </p>16 <p>17 <input type="checkbox" id="ln">18 <label for="ln">Ketchup</label>19 </p>20</body>21</html>The CSS
1[type="checkbox"]:checked,2[type="checkbox"]:not(:checked) {3 position: absolute;4 left: -9999px;5}6[type="checkbox"]:checked + label,7[type="checkbox"]:not(:checked) + label8{9 position: relative;10 padding-left: 28px;11 cursor: pointer;12 line-height: 20px;13 display: inline-block;14 color: #666;15}16[type="checkbox"]:checked + label:before,17[type="checkbox"]:not(:checked) + label:before {18 content: '';19 position: absolute;20 left: 0;21 top: 0;22 width: 18px;23 height: 18px;24 border: 1px solid #ddd;25 background: #fff;26}27[type="checkbox"]:checked + label:after {28 content: '';29 width: 5px;30 height: 10px;31 border: solid #15C39A;32 border-width: 0px 3px 3px 0;33 position: absolute;34 top: 2px;35 left: 6px;36 -webkit-transition: all 0.2s ease;37 transition: all 0.2s ease;38 -webkit-transform: rotate(45deg);39 -ms-transform: rotate(45deg);40 transform: rotate(45deg);41}Conclusion
Importing the files as per the above example will work fine. You can make customizations to make it even better. Or comment below if you have any more suggestion to enhance it.
Thanks for reading my article.
Your feedback is valuable and encouraging.
Happy coding.